Isn't this a wonderful idea? Just get a large wooden barrel and follower these instructions! I hope I can find one so I can give this a go!!
Showing posts with label DIY. Show all posts
Showing posts with label DIY. Show all posts
July 1, 2012
May 14, 2012
Mason Jar Idea
I love this idea! I wanted to do moss in jars for a while and I had seen one type but this way would work even better for me!!
Check out more ideas from Poppy Talk!
May 12, 2012
Paint By Numbers Wall
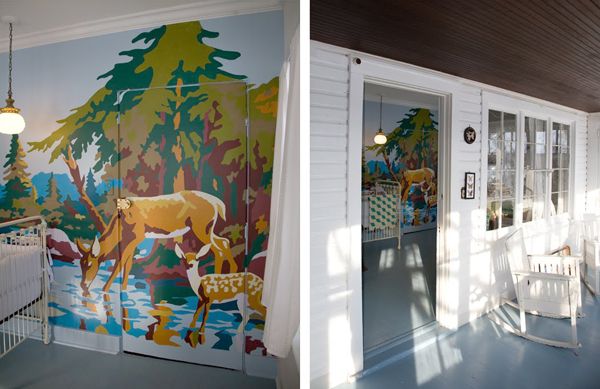
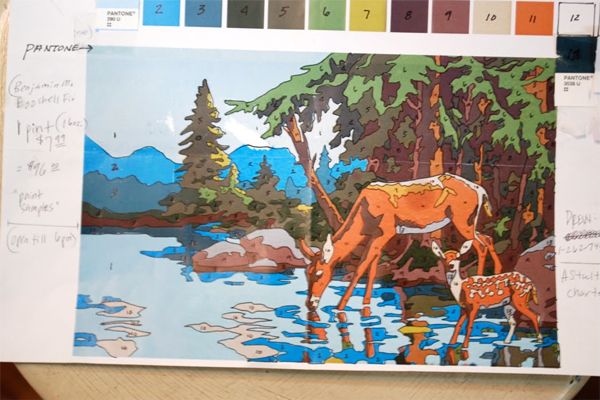
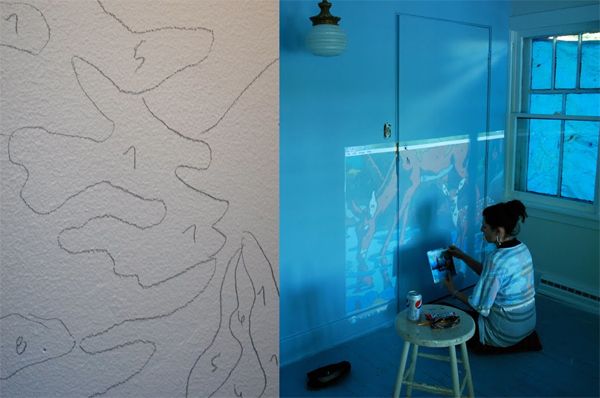
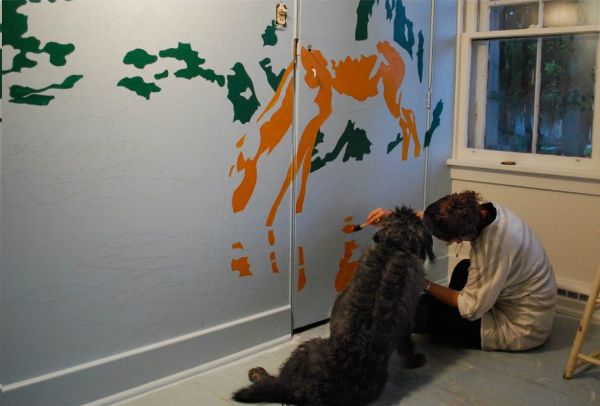
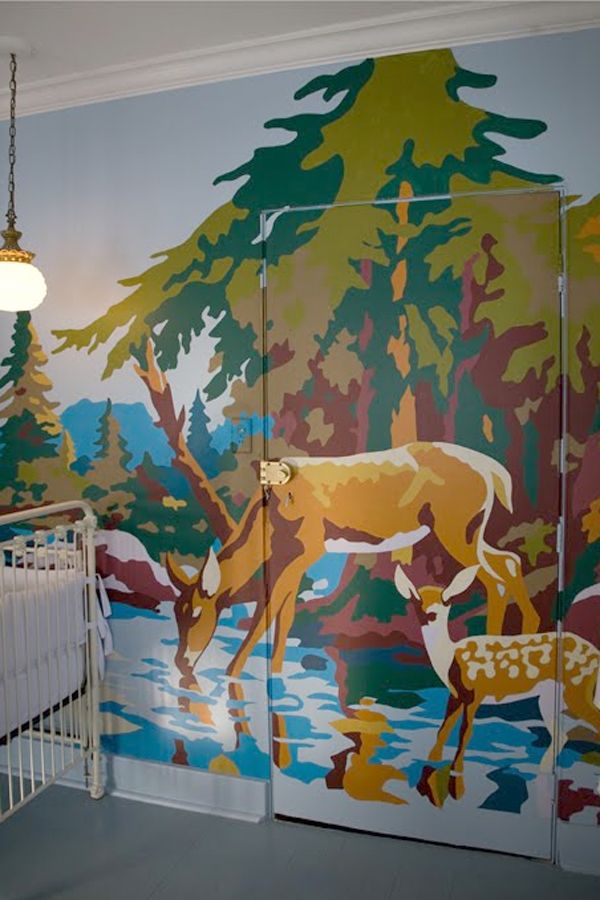
I never thought of this but what a wonderful idea right? I mean you don't have to have much for skill other then being about to be patient and paint in the lines! Check out more great ideas at The Lettered Cottage.
Labels:
DIY,
Dream House,
Tutorials
at
8:00 AM
May 6, 2012
Typecase = Coffee Table DIY
I love this idea! Check out more of Mag's wonderfully unique ideas over at her Etsy shop or at Craft
Labels:
DIY,
Dream House,
Tutorials,
videos
at
8:00 AM
February 19, 2012
22 things that make life easier
1. Hull strawberries easily using a straw.
3. Remove crayon masterpieces from your TV or computer screen with WD40.
4. Stop cut apples browning in your child's lunch box by securing with a rubber band.
5. Overhaul your linen cupboard, store bed linen sets inside one of their own pillowcases and there will be no more hunting through piles for a match.
6. Pump up the volume by placing your iPhone & iPod in a bowl. The concave shape amplifies the music.
7. Re-use a wet-wipes container to store plastic bags.
8. Add this item to your beach bag. Baby powder gets sand off your skin easily.
9. Use wire to make a space to store gift wrap rolls against the ceiling, rather than cluttering up the floor.
10. Find tiny lost items like earrings by putting a stocking over the vacuum hose.
11. Make an instant cupcake carrier by cutting crosses into a box lid.
12. Forever losing your bathroom essentials? Use magnetic strips to store bobby pins, tweezers and clippers, behind a vanity door.
13. When traveling, store shoes inside shower caps to stop dirty soles rubbing on your clothes. And you can find them in just about every hotel.
14. A muffin pan becomes a craft caddy. Magnets hold the plastic cups down to make them tip-resistant.
15. Bread tags make the perfect cord labels.
16. Bake cupcakes directly in ice-cream cones, so much more fun and easier for kids to eat.
17. Microwave your own popcorn in a plain brown paper bag.
18. Install a tension rod under your sink to hang your spray bottles.
19. Turn your muffin pan upside down, bake cookie-dough over the top and voila, you have cookie bowls for fruit or ice-cream.
20. Freeze Aloe Vera in ice-cube trays for soothing sunburn relief.
21. Create a window-box veggie patch using guttering.
22. Use egg cartons to separate and store your Christmas decorations.
February 10, 2012
Chicken Wire=Message Board
Isn't this a great idea? And so cheap! When we bought out house there was a lot of chicken wire left behind and I've kept it trying to think of ways to use it and I love this idea!
Labels:
DIY,
Dream House
at
8:00 AM
December 11, 2011
Christmas For My Cards
 | ||
| Beau Ideal |
I think I am going to do this with all my Christmas cards! Although I'm not too sure I want to put that many holes in my walls. I'll come up with a way to get around it.
Labels:
christmas,
DIY,
Dream House
at
8:00 AM
November 26, 2011
Crayon Art
Isn't this wonderful??? When I have a wall that needs some fun I am totally going to do this!! Check out more about this and all sorts of other fun things here!
September 19, 2011
Crates to Garden Table
Can I please have this?? I am totally going to get Marshall to make me this! I wanted a table to do gardening work on and this is perfect! I didn't want to buy something pretty because well it's just going to get all dirty and making it out of crates is even better to me!! I can't wait for this!!
March 15, 2011
How to add buttons to your blogspot blog, without spaces
 I was searching for a good tutorial on how to do this and I found that a lot of them weren't very detailed and left out things and just didn't totally make sense. I pieced together a few, and got a couple answers from my sister so I thought I would post what I did here. It seems that everyone has a different way, a different code, but I hope you find this helpful either way.
The buttons I am talking about can be anything from badges from other blogs, to buttons of different series you do on your blog (like mine you'll see to the right).
1) Upload your photos to some place like Flickr or Photo Bucket
2) Open up a new widget in blogger called HTML/JavaScript
3) Put in the code below:
<a href="THE URL OF YOUR BLOG" imageanchor="1" >
<img border="0" src="THE URL OF YOUR IMAGE"Â alt="Link to YOUR BLOG TITLE"/>
</a>
Note: You will need this code each time, for each button. Example: If you are five buttons to do you will have to paste this code in five times.
4) Insert the blog link in the two locations listed:
<a href="THE URL OF YOUR BLOG" imageanchor="1" >
<img border="0" src="THE URL OF YOUR IMAGE"Â alt="Link to YOUR BLOG TITLE"/>
</a>
5) Insert the URL for your image in the spot listed:
<a href="THE URL OF YOUR BLOG" imageanchor="1" >
<img border="0" src="THE URL OF YOUR IMAGE"Â alt="Link to YOUR BLOG TITLE"/>
</a>
Note: In Photo Bucket that URL will be labeled as the Direct Link
6) I suggest at this point to save the widget and take a look at how it looks on your blog and to see if it is in fact linking to where you want it to go (there's nothing like doing 10 of them and then realizing you did it wrong!)
7) Go back into your widget and repeat this as many times you need to get all your buttons loaded.
Note: If you don't want any spaces between your buttons simply don't leave any spaces between the code. When you do buttons as a picture widget you will automatically have spaces because that's coded into your template. It gets a little more complicated to get rid of those spaces so this is the easier way to go about a group of buttons
8) Save the widget and in your design page of your blog drag it to where ever you want it to be in your layout
Pretty easy right? I hope this helps! Happy blogging!
If you want some more help on your blog here's a great site!
Subscribe to:
Posts (Atom)
